Wednesday, July 10, 2013

Easy Peasy Salsa recipe! Easy. Quick. Cheaper than store bought!

Ahh the late garden this year is going great! Next year it's going to be bigger & better. In a few months we should be putting up the greenhouse and building the outdoor pizza oven. But for now I decided to take a few items from the little garden to make salsa. I lovvvee salsa. I love going to different Mexican restaurants just to try their house salsa. I also do like store bought, but have you checked the prices lately? Three dollars for a small jar..I mean seriously? Yes, you can make it cheaper then that! Let's get started. Here is your line up. YES!! I know it's a lemon & not a lime but they were out of limes or I couldn't find them. I usually have lemons on hand though so it works, works really well too!


You'll be doing this in your food processor but unless you want to make it a totally smooth salsa you'll want to chop up the fresh ingredients a bit. I am using canned tomatoes since my fresh ones haven't come in yet. The ones I buy at the farmers market are $2.98 a pound!! OUCH so I save them for salads until mine come in. I stock up on canned tomatoes when ever I find sale, usually $1.00 a can. Buy the best canned tomatoes you can. If you can find Red Pack go for it, they are my favorites, or 6 in 1. Generic brands just don't seem to have the same fresh tastes for some reason. I like my generic brands, I use them often but there are some things that just worth paying for..hence a good name brand canned tomato. Here I am using diced but you can do this with whole or even crushed if you like. If you have fresh then I would say about 6 roma tomatoes would equal one can. Lucky you!!


One tip for cutting hot peppers is to lightly coat your hands in oil. It really works. If you have ever touched your eye with your pepper hand, well you know what I mean, I see you nodding your head. Pain. That is all.


Sunday, June 23, 2013

Making Chinese Rice Wine. Easy how to make it cheap!

Think about this one....when and if the shit hits the fan one of the most sought after items is going to be alcohol. So let's enjoy ourselves & practice a little...okay, that's my story and I'm sticking to it. I actually really do like this stuff. No, it's not going to be clear like Sake or any wine but I can promise that if you follow my directions while adding a little fruit juice of your choice, you will have a very satisfying homemade drink in just about 3 weeks time (or shorter if you like). I add Pom Pomegranate juice which makes it taste just like a dry red wine. With cherries in season right now I am going to be making cherry juice this week which I think will be another lovely addition.
Okay, let's get started. This is what I use:


I live out in the boonies so I have to drive 40 miles to the nearest Asian market to pick up my 20 pounds of Jasmine Rice for about $20.00. Don't have Jasmine rice, use what you have, it will be just fine. I mean, it's rice so taste might be a tiny bit different.

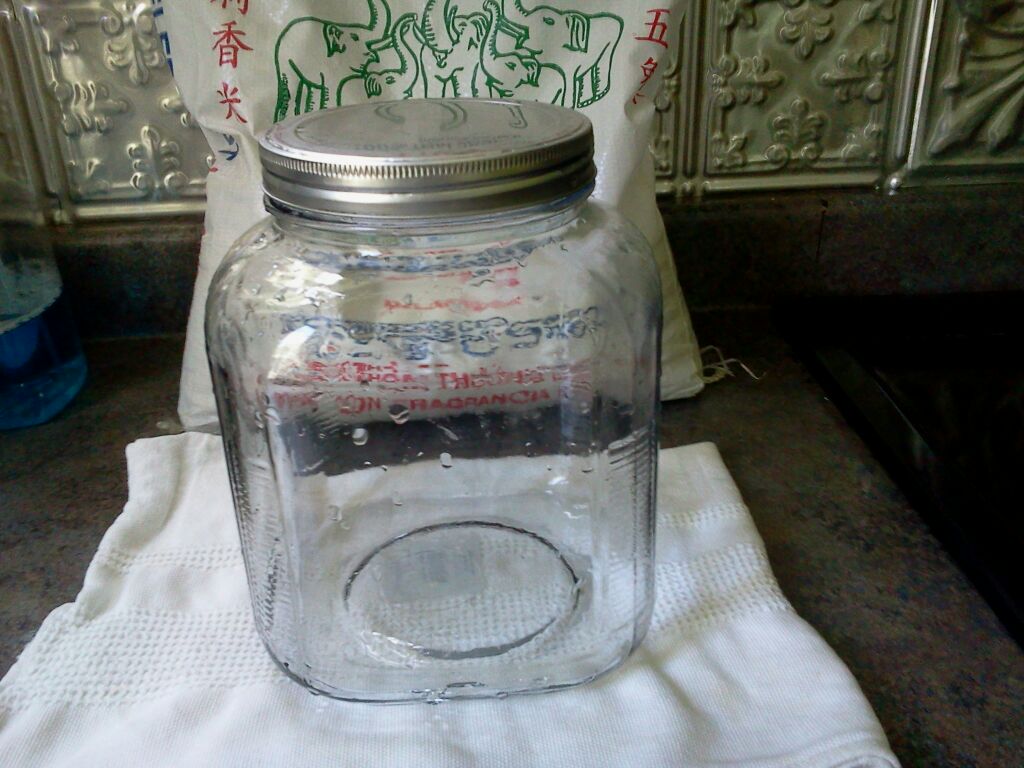
Another item I use is a one gallon jar which is by Mainstays by Walmart at a cost of $5.00. This jar holds the entire 8 cups of rice which will make half a gallon of wine (not bad at all!!). I have other jars that I use also for smaller amounts. As long as it has a lid, you are good to go.


The main ingredient which you might have to mail order is Chinese Yeast Balls. I use 3 balls (not 3 packets) to make my half gallon of wine. You can probably find them in Asian markets but if not I have ordered them from Importfoods.com under dried yeast balls. I spent a little over $15.00 to get 20 yeast balls. Shipping was fast too. I plan to see what else they have interesting on my next order.
They look like this:


In addition to the 3 yeast balls you will need 2 tablespoons of sugar. I guess I should say that the sugar is optional but I think that using it give the rice wine a higher yield. You will also need some cheese cloth or a clean cut up pillow case.

Let's begin, here is the list:
  1. 4 cups Jasmine or other rice
  2. 8 cups of fresh water
  3. a one gallon jar with lid, note: the wider the mouth the better!
  4. 3 Chinese yeast balls
  5. 2 tablespoons of sugar
  6. 1 length of cheese cloth or pillow case
  7. 21 to 30 days in a dark area (or until you can't take it anymore or run out of beer)
The most import thing is to make sure that everything you use is going to be very clean. I don't boil my items but I make sure that everything has been washed in soapy hot water immediately prior to beginning rice wine making. I even give my cheese cloth a good 10 minute spin the dryer just to be sure. 

Step 1:
Rinse your rice for a few minutes in a mesh sieve or a colander lined with cheese cloth. Some people soak their rice but I found it didn't make much of a difference. I also forgot to rinse my rise once which didn't seem to hurt anything either.

Step 2: 
Cook your rice as you normally do. I use the old fashioned method of cooking the rice & water until it starts to boil, then simmer covered until you can no longer see any water on top of the rice. Keep covered, remove from heat & let steam for about 20 minutes. I find a sticky rice gives the best yield.

Step 3:
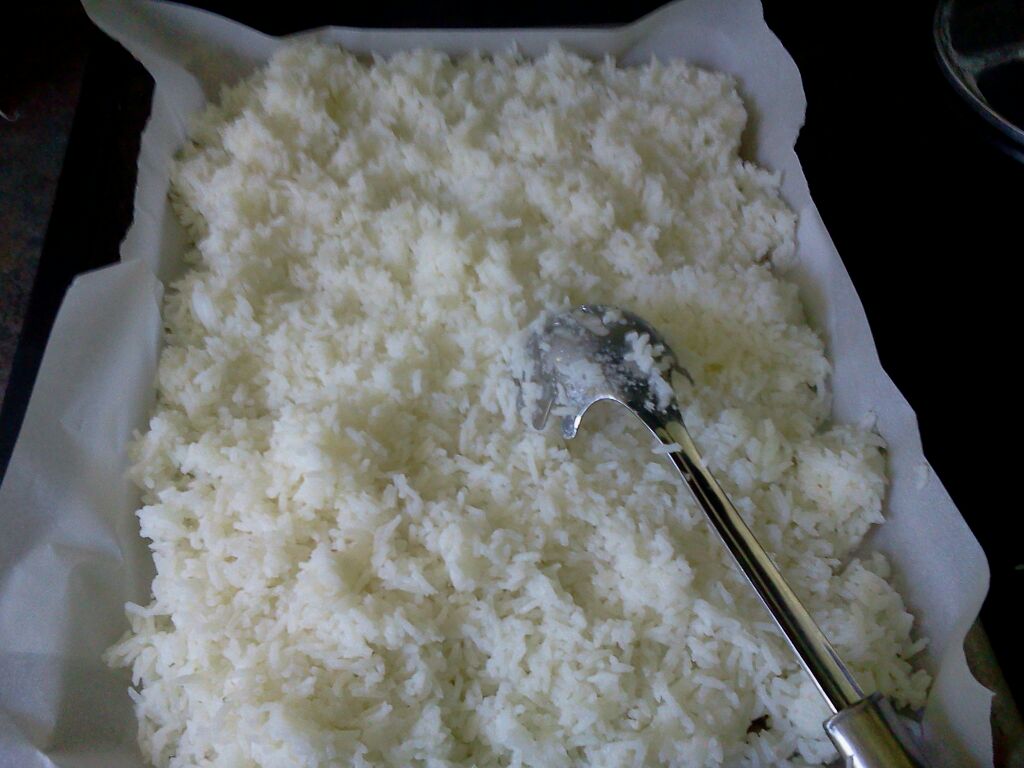
Cooling the rice. There are alot of ways to do this. I have read some people just let it sit on the stove overnight. As you can see in the below photo I use a sheet pan lined with parchment paper. This makes it a little less messy for me...and I do mean, you are going to make a mess, there will be rice stuck to everything!! I move my rice around a little bit to help it cool faster...did I mention it sticks to EVERYTHING??? LOL 


I don't wait for my rice to be totally room temperature cool. I wait until it feels still a little warm. You don't want to kill the yeast (make sure there is no steam coming out of the rice when you move it around!) but I think the rice being a little warmer then room temperature helps the yeast active faster!

Step 4:
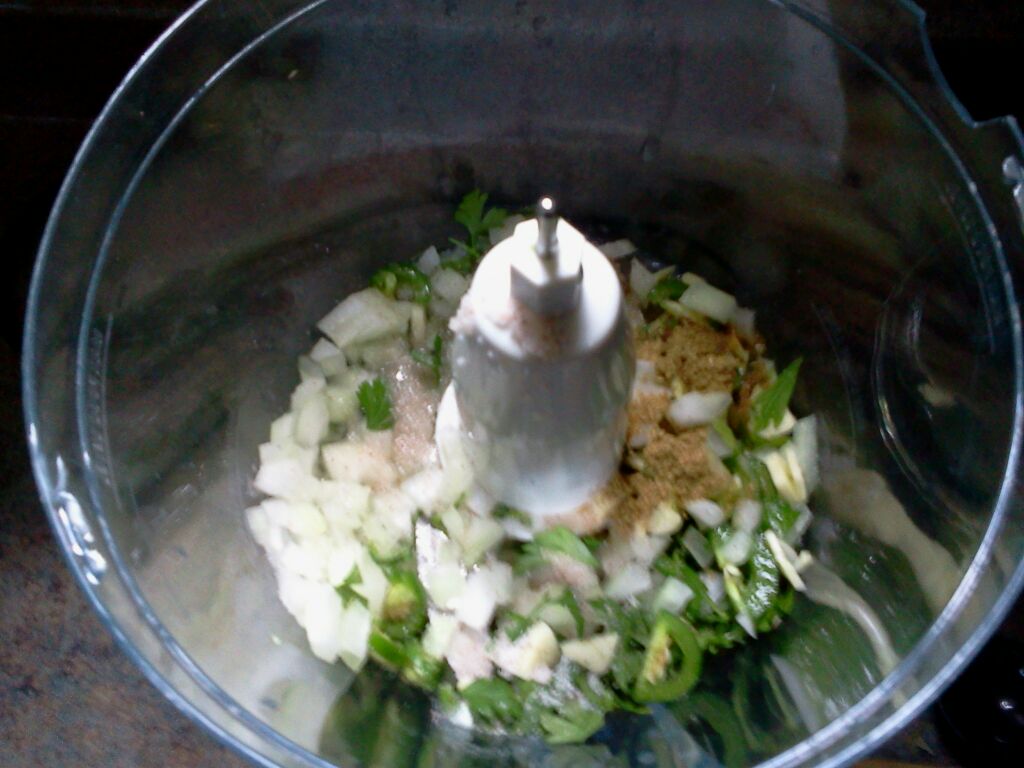
Take your 3 yeast balls & 2 tablespoons of sugar (if you like) and crush them into a powder. There are many different ways to do it, many people put them in a plastic bag & bang them good. It doesn't take much as they are already very crumbly. I use a small food processor that I purchased wayyyy back when I was watching the wheel be invented...cause I'm old like that.  Again, make sure EVERYTHING you use is really really clean including your hands!


Step 5:
If you have your rice in a tray such as mine, sprinkle the yeast evenly over the top. If you are using a bowl you will have to mix it in slowly without making the rice into mush.

Step 6:
Pack your rice into jars. You can also mix the yeast around a little if you are using the tray method. I find that forming it into a good size ball (not squeezed together) makes it easier to place in the jar. You don't have to pack it down, lose is just fine. I use 4 layers of cheese cloth then cover with the lid firmly in place. It should look like this:


Step 7: Now this is the HARDEST PART!! IMPORTANT!! HIGH PRIORITY!! Place your jar of rice and yeast in a dark spot. DO NOT and I repeat DO NOT open the jar for at least SEVEN days. No sniffing no stirring it around. Just leave it alone. I think this is where most people fail, they just have to touch it which lets bacteria or other yeast in the air in before the little wine making yeasties have a chance to take over. Take your jar out & admire your handy work. Usually by the next day you will be able to see some wine at the bottom...just do.not.open.the.jar. You want to place your jar in a dark closet or other dark area..did I mention DARK? Light makes mold, go dark for about 20 to 30 days or until you can't take it anymore & just need to try it!!

I will update when my jar makes progress. Until then...Cheers! Kimberly

This is my rice wine after one week. The top forms a slightly yellow soft crust. You don't want to see black in there (at least I don't). You can drink this stuff at any stage. One recipe I read calls for fermenting for just 3 days. But if you want to enjoy a nice half gallon bottle then by all means wait the entire 3 weeks. It's fun, tastes good, sort of like a dry red wine. This isn't going to be a clear product, it will be cloudy but if you add some fruit juice to it, no one will even notice. 

I decided to decant my rice wine early so after about 2 weeks or so.  It was looking good and I need to start another batch for a friend...nah, myself. I need to use up my rice before I get another bag..that's my story. teehee Here is what it looks like before decanting.


This is what the top looks like. I made a hole in the middle this time to see if it would make any difference. It didn't. You can see that the top looks rather dry, but it's not a dry hard. 


I use the same cheese cloth that I used to line the lid of the jar to strain it. I use a colander inside of a large bowl due to the simple fact that the pile of rice mush is very heavy. It just makes it easier to strain that way. There is no science to this, you can do it however you like but you are going to be squeezing the cheese cloth to get all the wine goodness out....and you don't want to miss a drop!!


Now carefully dump the liquid into your lined bowl. Allow the clump of spent rice to gently slide out into the cheesecloth. Pull your corners together & squeeze until no more liquid comes out of your rice ball. You will be left with a little bit more then a cup of rice. Some people eat it, it tastes good. I tried my chickens but they weren't having any of it.


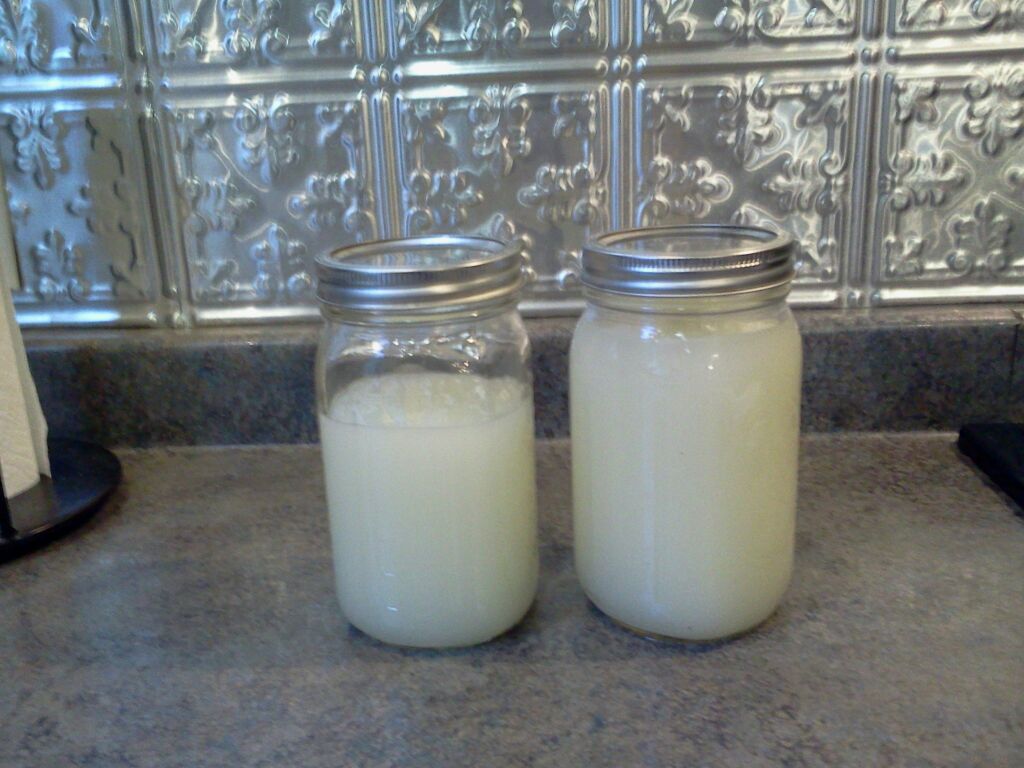
Decant your rice wine into the vessel of your choice. I just use mason jars because they are handy and I'm too lazy to find the funnel to put them into wine bottles. You should have made about 2 quarts. Mine looks a little low because I spilled almost a ladle full ....what can I say, that's the way I roll. As I type this I smell like an old drunk who rolled in chicken poo. 


Your end result will be cloudy but it will settle out in the refrigerator. I like to shake mine up. While the white at the bottom might not look real good it makes the wine more tasty..at least to me it does. There has been varied experiments to clear it up, but I haven't found any to be successful that didn't include the loss of not only taste but also of product. If you find a way, please let me know. I don't know if the alcohol content has been measured but I find that 20% is probably a good bet. I think that it lessens in time so drink it now!! It lasts about a good month in the fridge. It will start to turn colors but it's still a nice dry wine. I don't add my fruit juices until I drink them, I think that it would make the wine go bad faster...I'm likely wrong on that.

Now it's cherry season so I made some cherry syrup to add to my wine. I just love cherries!! They are like little smiling faces that cheer me up...hmm, maybe that's why they are called cherries!! I make mine real simply. It's just a simple syrup, 1 cup of sugar to 1 cup of water, bring to a boil, add 3 handfuls of cherries (before pitting) then let is simmer away for about 25 minutes. Strain then cool. If you don't want it that sweet then of course cut the sugar. I think I only added 3/4 of a cup this time, next time I will probably do 1/2 a cup. It looks like this.


When you add it to your rice one it reminds me of a dry red. Of course you can drink your rice wine all on it's own, it really does have a good flavor. I was thinking of investing in one of the carbonation thingys. I think it would be fun to have it with some bubbles. Plus it makes such a pretty color! Shhh..I know, I don't have any actual wine glasses, I break things with long stems! Really!! I think I need to buy one of those huge wine glasses ass seen on Cougar Town (a show I didn't really want to like but once I started watching I loved it!!). Anyway, that's about for this page on rice wine. Here is the pretty color it becomes with cherry syrup. Cheers! Kimberly


Wednesday, June 19, 2013

Turn of the Century Parlor Chairs makeover Part 2 Citristrip the frame!

Yeah yeah, I know if these chairs didn't have paint & glitter nail polish on them I likely would have kept the wonderfully worn antique finish but it it is what it is and now I am committed to making them beautiful for another hundred years (hopefully).

Chairs that haven't been painted normally do not need Citristrip piled on like you normally would when trying to remove layers of paint. I found a light layer works great! I leave it on for approximately 5 minutes then move it around with the brush a little. If you feel a tugging the old finish still needs more time. I move my brush around adding more if it's starting to dry out. If you don't overload your piece then it makes the removal alot less messy. I remove the Citristrip with 0000 steel wool. Note it takes alot of steel wool to complete a project like this, make sure you have enough handy. You don't want to use a paint remover & damage the old stained finish.This is what my light layer looks like.


This is what the back of the piece looked like before Citristrip. I just love this stuff, it doesn't burn like the old stuff but you really do still want to wear gloves. It smells great & seems to do the job. To be honest I haven't tackled a huge massive painted piece ...yet, but I will let you know when I do & do a comparison with other paint remover products and treatments. So far this has worked great on the few pieces I have done that were covered in old shellac & poly finishes. It even removed oil based paint from plastic without melting it..now that says something!


After removing the Citristrip with 0000 steel wool.


Once you are totally finished stripping off the old finish grab your can of denatured alcohol and an old sock. You know those single socks you find in your dryer? They are perfect for this! Or a worn towel cut into pieces, old pillow cases anything that is soft and absorbent. Rub down your entire piece. If you are doing chairs like me right now you are thinking..what did I get myself into? Damn, chairs have many more parts then I even ever considered! They do but it's worth it! Rub rub rub! This removes the Citristrip and helps even the finish.

I believe my chairs are either pine or ash with a cherry stain and probably many coats of a dark amber shellac. I like the color but it's a little too red for me. I am going to upholster them in a medium gray restoration velvet so I think the red tone will be a little too clashy..clashie? Hmm. So General Finishes to the rescue. I don't want to change the old patina on the chairs so this treatment was done extremely quickly. Two hands in motion at all times. One had applies the finish on just the end of a paper towel the other immediately wipes it off...no waiting, do not stop. Rub back & forth with the clean paper towel until it reaches the level that you desire. By all means if you want to change the color like I did with my previous chairs, leave it on for a while before whipping off. However you want to darken the color down a little and fix old scrapes & scratches do it quickly. Obviously if you don't want to change the color but to just freshen the original stain use a closer match. 


Here is the chair with the old finish removed and the stain refreshed. I did both chairs using about half a bottle of Citristrip, one large bag of steel wool and only about 1/8th of a teaspoon of General Finishes per chair (this stuff goes a looooongggg way!!). 
Cheers till later!


Monday, June 10, 2013

Turn of the Century Parlor Chairs - Makeover!

Soooo I have this thing you know..for chairs!! Okay, that's a lie, I will be honest and just tell you that if it's old, it calls my name. Please save me from the dumpster it screams! Fix meeeeee!!! And I have, lots over the years. When I saw these two old beauties show up on one of my Facebook feeds I stared long & hard. I walked away. I walked back. I wanted them..but, but, but..I already have two chair projects that I haven't even touched!! But, these two chairs, probably part of a parlor set needed me! I could see them in gray velvet which I already have. I can't let that beautiful restoration velvet go to waste could I? No. And the chairs I wanted from Overstock in gray velvet were going to cost $550.00..soooo. SOLD. I love it how easily I can justify a purchase. This doesn't come easy it takes years of practice. I will say it was alot easier when my sister & I had our antique store. I could bring new things into my home & move my older tired of with items into the store. Perfecto!

Here is one of the two matching chairs. I do actually kinda like the brown velvet that's on it now, but the springs need to be retied so I doubt I can save it.


Here is the cut velvet fabric that is under the cut velvet brown fabric. I am sure this is from the second reuphoster job. I love this fabric & actually have purchased a crazy quilt that has square from it. 


Stripping down antique chairs can sometimes be a job..but it's a job you need to love! I found this interesting bar across the front. This was likely done to save your thighs when you sit down. I removed it, I will use fox edging to make it nice & comfy. 


When in doubt just use longer tacks! Nah, you don't have to remove the cluster of tacks from two previous jobs just make it work, make it fit!! Waaaa...uggghhh. My hands hurted after this.


Springs!! Yah, I knew they were in there but I bought them anyway. New adventure what can I say. I usually shy away from springs but now we have the internet! Blogs! Youtube!! Now I can do it! Okay I can TRY to do it..anyway. I believe these springs haven't been tied down in a looonnnggg time. Since it was first made I believe. When I took the batting off the springs were tied to the burlap, not each other.

I hope to tackle the finish today. Normally I would restore it but ..sadly they do have white paint splattered all over them (bummer!).

Thursday, June 6, 2013

Oh no! Ikea Ektrop slipcovers aren't bright white! A fix!!

Hi Everyone! Maybe like me you adore white slipcovered sofas! I love mine because I change colors anytime I want! I also live with six cats & three dogs. Plus I just love the smell of fresh clean smelling like Gain furniture anytime I want! YUMMMYY  Anyway, I recently purchased new white slipcovers for my Ikea Ektrop. Sadly, they aren't as white as seasons past....why Ikea? Why? The reason we purchase them is so that we can use bleach or hang them outside, we need bright white Ikea! Your website lies! Love you anyway, mean it!

So one of cats decided to puke on the bottom cushion.. because getting off the sofa & doing it on the wood floor was just too hard!! Right Princess? It's okay, I love her anyway. Having so many pets, the normal routine, bring out the enzyme clearer & got to town. I ripped off the cushions..cause you know, cats just can't yuke on ONE spot!! Spray down cushion, stick it outside to dry & toss all the bottoms in the wash. Guess what? The spot came clean of course but it was bright white. Time to take action, I had to get the cushions to match!

I'm not sure if you can tell by this picture the difference in color whites on the slipcover. I must say it's very subtle. I can't tell from across the room that the Ikea slip is off color from my bright white taffeta curtains but up close I can. It was driving me nuts!


My second wash I used a half cup of near Oxyclean. I say near  Oxy because I purchased it for a dollar a tube at Dollar Tree. I think it's the same stuff they sell for almost 4 at Walmart. I also added a cup of Four Mule Team Borax. I figured that there was probably alot of chemicles used in the slipcover process that needed to come out..is that weird? It's just fabric right?  With this many animals on the farm, I love faux Oxyclean. I set it on a quick clean cycle but opened my washer & let it soak for about 30 minutes. When it was finished the cushions were white, but not white enough. The next cycle I ran was whites plus stain soak in warm water. YUP, I did...warm.  I only used regular laundry detergent and a cup of bleach. I let this load soak for another 30 minutes. I was worried about so much soaking & washing but these Ektrop slipcovers are still as stiff as new...only now, they are bright white instead of offs kinda yucky off white!! Yippeee So if you ordered some thru the mail because your Ikea is 5 hours away like mine take heart! You can make the nice, sunny, bright white & just awesome like you have always wanted! I love my Ikea Ektrop..did I say that already? Cheers! Kimberly


My Jersey Giant hatched some babies!


It's always a happy day on the farm when there is a hatching. Frankly I'm amazed that these eggs hatched at all! First they over weekend it at the post office because we do not get delivery back this far in the woods. By the time I received  notification the post office was already closed. Off to a bad start! Half Comb (that's her name, don't judge!) had already been broody for about 10 days so I wasn't sure if she would last on them. If she snubbed them I would have just put them in my incubator. About an hour after I removed the old eggs & replaced them with the one's I purchased from E-bay, she got off the nest for a loooonnnggg time...not good, about 2 hours. Periodically thru out her broodiness she would leave the nest, other hens would get in...some hens lay standing up so their eggs would smash into the bottom eggs, we lost at least one egg that way. One day I came home to find Half Comb taking a dust bath. I felt the eggs, stone cold..ugghh. Oh well, we only had a few more days to go so I just left them in her nest, counting the pennies I was about to lose. But I should have known better, she is only a year old, a little early to be a momma.  A few days later I was taken by surprise to hear cheeping!! Yeah, at least we will get one..expensive but worth it. I have been wanting some Lavender Orpington's and some Coronation Sussex for a very long time. She managed to hatch six out of eight so way to go new Momma! She hasn't had any problems with the rest of group except for Penney the peahen. I don't think Penny wants to harm them I think she wants to steal it!! If you have ever seen a large hen & a peahen fight, it's pretty scary. Hopefully they will work it out. Happy Days!

Tuesday, May 28, 2013

Sun Oven Solar Cooking, My review.

I purchased my Sun Oven approximately 8 years ago. They aren't cheap but considering this one should last another 10 years or so they certainly do pay for themselves. I had to contact customer service because everything I cooked in my first two tries ended up tasting like rubber. They said they had defective seals & sent me an entire new base via over night mail! Impressive! My poor solar oven has suffered abuse! She has caught the wind & been tossed around the yard more then a few times. She has been caught in a few rough thunderstorms but always manages to stand up right & catch the suns rays. She has dings & dents but still works as if new. I think I will however look into replacing the oven temperature gauge. It's right on the window & not accurate. I find a digital probe inserted in the food works great! 

Cooking in the solar oven is simple. Anything that you cook in your electric slow cooker can be done in the sun oven. I use mine year round but of course in the winter things will take longer. In this picture there is a chicken cooking. I put it in around 10:30 am she will probably be done between 1-2:00. It's summer here in North Carolina so we will still have enough sun to add in some biscuits once the large pot is removed. Potatoes can also be cooked in the bottom of the cooker, just wash & throw them in. When you cook bread  and if you want a browner crust, simply brush with butter. Cakes work awesome too. If I have to go out for the day I position the sun over where I estimate the sun will be around noon. This way when you get home your meal should be ready. I have never burned anything in my sun oven though I have managed to dry out some beans. I plan to either purchase or make another one so that I can do two meals at one time. 

It's fun, saves power, doesn't heat up your kitchen & works great! Two thumbs up Sun Oven!

Solar chicken out (took about 3 hours for a 5 pound hen, probably less but I couldn't find my probe).

Solar Southern Style Biscuits in. I use cast iron, it works really well. I could have used my cast iron dutch oven for the chicken as well. Any dark colored cookware works great!


 These are the solar biscuits cooked. They aren't bad really. I have enough sunlight left to cook up some chickpeas for hummus tomorrow! I'll give that recipe later! Cheers & eat fresh!